Instructions
Exam Environment
Exam Interface and Controls
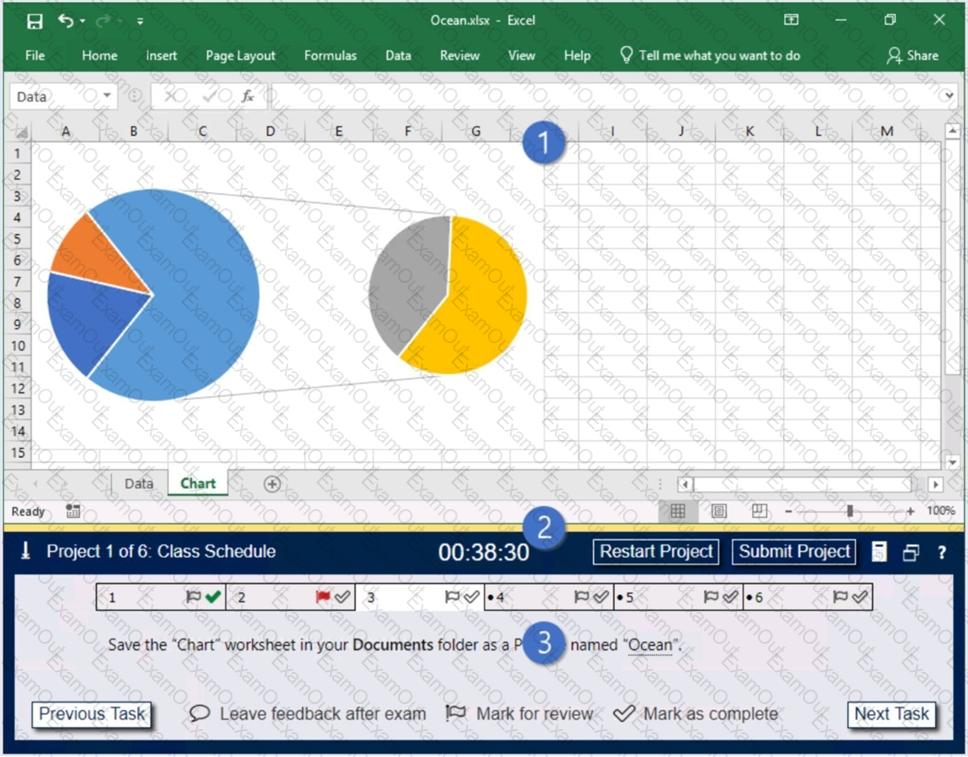
The exam panel provides access to the project task(s). Each project has an associated file in which you will perform the project tasks.

1. Project file
2. Split bar
3. Exam panel
You can modify the exam interface to fit your needs in the following ways:
To increase or decrease the exam panel font size, press Ctrl+Plus or Ctrl+Minus.
To change the height of the exam panel, drag the split bar between the project file and the exam panel.
To minimize the exam panel, click the Collapse Panel arrow in the upper-left corner of the exam panel. The minimized exam panel displays the Expand Panel button, the project number and name, the remaining time, and the Restart Project and Submit Project buttons. To move between tasks, you must expand the exam panel.
To restore the interface to the default appearance, click the Restore button near the upper-right corner of the exam panel.

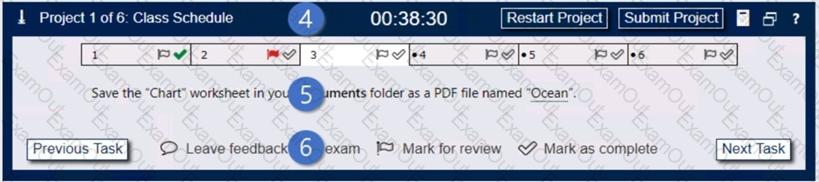
4. The Information bar at the top of the exam panel displays the current project and total number of projects, the remaining exam time, and the following commands:
Collapse Panel. Minimizes the exam panel to provide more space for the project file.
Restart Project. Closes and reopens the current project file without saving your changes.
Submit Project. Saves your changes, submits the project file, and moves to the next project.
Calculator. A calculator is available in some exams. You are not required to use the calculator.
Restore. Restores the size and position of the project file and exam panel to the defaults.
Help. Displays information about the exam interface.
5. The Content area displays the task tabs and the current task description.
6. The Navigation area at the bottom of the exam panel contains the following commands.
Previous Task/Next Task. Saves your response and moves to the previous or next task in the current project.
Leave feedback after exam. Flags the task to indicate that you want to leave feedback about it after the exam.
Mark for review. Flags the task to indicate that you want to return to it before you finish the exam.
Mark as complete. Flags the task to indicate that you feel you have completed the task.
In projects that contain multiple tasks, you can switch between tasks by clicking the task tab, Next Task button, or Previous Task button.
End of the instructions.
On the “Sales Analysis” worksheet, insert a slicer that allows users to filter the PivotTable by “Category”. Then use the slicer to display only “Psychology” books.
The slicer size and position do not matter.

Instructions
Exam Environment
Exam Interface and Controls
The exam panel provides access to the project task(s). Each project has an associated file in which you will perform the project tasks.

1. Project file
2. Split bar
3. Exam panel
You can modify the exam interface to fit your needs in the following ways:
To increase or decrease the exam panel font size, press Ctrl+Plus or Ctrl+Minus.
To change the height of the exam panel, drag the split bar between the project file and the exam panel.
To minimize the exam panel, click the Collapse Panel arrow in the upper-left corner of the exam panel. The minimized exam panel displays the Expand Panel button, the project number and name, the remaining time, and the Restart Project and Submit Project buttons. To move between tasks, you must expand the exam panel.
To restore the interface to the default appearance, click the Restore button near the upper-right corner of the exam panel.
4. The Information bar at the top of the exam panel displays the current project and total number of projects, the remaining exam time, and the following commands:
Collapse Panel. Minimizes the exam panel to provide more space for the project file.
Restart Project. Closes and reopens the current project file without saving your changes.
Submit Project. Saves your changes, submits the project file, and moves to the next project.
Calculator. A calculator is available in some exams. You are not required to use the calculator.
Restore. Restores the size and position of the project file and exam panel to the defaults.
Help. Displays information about the exam interface.
5. The Content area displays the task tabs and the current task description.
6. The Navigation area at the bottom of the exam panel contains the following commands.
Previous Task/Next Task. Saves your response and moves to the previous or next task in the current project.
Leave feedback after exam. Flags the task to indicate that you want to leave feedback about it after the exam.
Mark for review. Flags the task to indicate that you want to return to it before you finish the exam.
Mark as complete. Flags the task to indicate that you feel you have completed the task.
In projects that contain multiple tasks, you can switch between tasks by clicking the task tab, Next Task button, or Previous Task button.
End of the instructions.
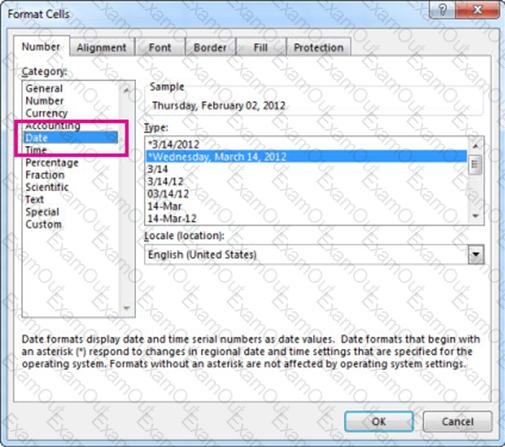
On the “New Titles” worksheet, for cells E4:E24, create and apply a custom number format that displays the dates in the format “2020 January 01”.

Instructions
Exam Environment
Exam Interface and Controls
The exam panel provides access to the project task(s). Each project has an associated file in which you will perform the project tasks.

1. Project file
2. Split bar
3. Exam panel
You can modify the exam interface to fit your needs in the following ways:
To increase or decrease the exam panel font size, press Ctrl+Plus or Ctrl+Minus.
To change the height of the exam panel, drag the split bar between the project file and the exam panel.
To minimize the exam panel, click the Collapse Panel arrow in the upper-left corner of the exam panel. The minimized exam panel displays the Expand Panel button, the project number and name, the remaining time, and the Restart Project and Submit Project buttons. To move between tasks, you must expand the exam panel.
To restore the interface to the default appearance, click the Restore button near the upper-right corner of the exam panel.

4. The Information bar at the top of the exam panel displays the current project and total number of projects, the remaining exam time, and the following commands:
Collapse Panel. Minimizes the exam panel to provide more space for the project file.
Restart Project. Closes and reopens the current project file without saving your changes.
Submit Project. Saves your changes, submits the project file, and moves to the next project.
Calculator. A calculator is available in some exams. You are not required to use the calculator.
Restore. Restores the size and position of the project file and exam panel to the defaults.
Help. Displays information about the exam interface.
5. The Content area displays the task tabs and the current task description.
6. The Navigation area at the bottom of the exam panel contains the following commands.
Previous Task/Next Task. Saves your response and moves to the previous or next task in the current project.
Leave feedback after exam. Flags the task to indicate that you want to leave feedback about it after the exam.
Mark for review. Flags the task to indicate that you want to return to it before you finish the exam.
Mark as complete. Flags the task to indicate that you feel you have completed the task.
In projects that contain multiple tasks, you can switch between tasks by clicking the task tab, Next Task button, or Previous Task button.
End of the instructions.
You are creating a product workbook for Tailspin Toys.
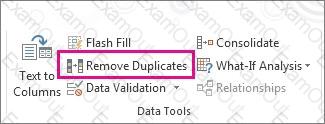
On the “Inventory” worksheet, use an Excel feature to remove the duplicate records from the “Products” cell range.
Instructions
Exam Environment
Exam Interface and Controls
The exam panel provides access to the project task(s). Each project has an associated file in which you will perform the project tasks.

1. Project file
2. Split bar
3. Exam panel
You can modify the exam interface to fit your needs in the following ways:
To increase or decrease the exam panel font size, press Ctrl+Plus or Ctrl+Minus.
To change the height of the exam panel, drag the split bar between the project file and the exam panel.
To minimize the exam panel, click the Collapse Panel arrow in the upper-left corner of the exam panel. The minimized exam panel displays the Expand Panel button, the project number and name, the remaining time, and the Restart Project and Submit Project buttons. To move between tasks, you must expand the exam panel.
To restore the interface to the default appearance, click the Restore button near the upper-right corner of the exam panel.

4. The Information bar at the top of the exam panel displays the current project and total number of projects, the remaining exam time, and the following commands:
Collapse Panel. Minimizes the exam panel to provide more space for the project file.
Restart Project. Closes and reopens the current project file without saving your changes.
Submit Project. Saves your changes, submits the project file, and moves to the next project.
Calculator. A calculator is available in some exams. You are not required to use the calculator.
Restore. Restores the size and position of the project file and exam panel to the defaults.
Help. Displays information about the exam interface.
5. The Content area displays the task tabs and the current task description.
6. The Navigation area at the bottom of the exam panel contains the following commands.
Previous Task/Next Task. Saves your response and moves to the previous or next task in the current project.
Leave feedback after exam. Flags the task to indicate that you want to leave feedback about it after the exam.
Mark for review. Flags the task to indicate that you want to return to it before you finish the exam.
Mark as complete. Flags the task to indicate that you feel you have completed the task.
In projects that contain multiple tasks, you can switch between tasks by clicking the task tab, Next Task button, or Previous Task button.
End of the instructions.
On the “2019 Visitors” worksheet, modify the conditional formatting rule to format rows for parks that have a “Size” greater than 1,000 square miles.
Instructions
Exam Environment
Exam Interface and Controls
The exam panel provides access to the project task(s). Each project has an associated file in which you will perform the project tasks.

1. Project file
2. Split bar
3. Exam panel
You can modify the exam interface to fit your needs in the following ways:
To increase or decrease the exam panel font size, press Ctrl+Plus or Ctrl+Minus.
To change the height of the exam panel, drag the split bar between the project file and the exam panel.
To minimize the exam panel, click the Collapse Panel arrow in the upper-left corner of the exam panel. The minimized exam panel displays the Expand Panel button, the project number and name, the remaining time, and the Restart Project and Submit Project buttons. To move between tasks, you must expand the exam panel.
To restore the interface to the default appearance, click the Restore button near the upper-right corner of the exam panel.

4. The Information bar at the top of the exam panel displays the current project and total number of projects, the remaining exam time, and the following commands:
Collapse Panel. Minimizes the exam panel to provide more space for the project file.
Restart Project. Closes and reopens the current project file without saving your changes.
Submit Project. Saves your changes, submits the project file, and moves to the next project.
Calculator. A calculator is available in some exams. You are not required to use the calculator.
Restore. Restores the size and position of the project file and exam panel to the defaults.
Help. Displays information about the exam interface.
5. The Content area displays the task tabs and the current task description.
6. The Navigation area at the bottom of the exam panel contains the following commands.
Previous Task/Next Task. Saves your response and moves to the previous or next task in the current project.
Leave feedback after exam. Flags the task to indicate that you want to leave feedback about it after the exam.
Mark for review. Flags the task to indicate that you want to return to it before you finish the exam.
Mark as complete. Flags the task to indicate that you feel you have completed the task.
In projects that contain multiple tasks, you can switch between tasks by clicking the task tab, Next Task button, or Previous Task button.
End of the instructions.
On the “Royalties” worksheet, the existing formula in the “Royalty Due” column calculates the royalties due to each author. On cell F4, modify the existing formula to return the amount of royalties due to the author only if the amount is greater than $25, and otherwise returns 0.
Instructions
Exam Environment
Exam Interface and Controls
The exam panel provides access to the project task(s). Each project has an associated file in which you will perform the project tasks.

1. Project file
2. Split bar
3. Exam panel
You can modify the exam interface to fit your needs in the following ways:
To increase or decrease the exam panel font size, press Ctrl+Plus or Ctrl+Minus.
To change the height of the exam panel, drag the split bar between the project file and the exam panel.
To minimize the exam panel, click the Collapse Panel arrow in the upper-left corner of the exam panel. The minimized exam panel displays the Expand Panel button, the project number and name, the remaining time, and the Restart Project and Submit Project buttons. To move between tasks, you must expand the exam panel.
To restore the interface to the default appearance, click the Restore button near the upper-right corner of the exam panel.

4. The Information bar at the top of the exam panel displays the current project and total number of projects, the remaining exam time, and the following commands:
Collapse Panel. Minimizes the exam panel to provide more space for the project file.
Restart Project. Closes and reopens the current project file without saving your changes.
Submit Project. Saves your changes, submits the project file, and moves to the next project.
Calculator. A calculator is available in some exams. You are not required to use the calculator.
Restore. Restores the size and position of the project file and exam panel to the defaults.
Help. Displays information about the exam interface.
5. The Content area displays the task tabs and the current task description.
6. The Navigation area at the bottom of the exam panel contains the following commands.
Previous Task/Next Task. Saves your response and moves to the previous or next task in the current project.
Leave feedback after exam. Flags the task to indicate that you want to leave feedback about it after the exam.
Mark for review. Flags the task to indicate that you want to return to it before you finish the exam.
Mark as complete. Flags the task to indicate that you feel you have completed the task.
In projects that contain multiple tasks, you can switch between tasks by clicking the task tab, Next Task button, or Previous Task button.
End of the instructions.
On the “Volunteer Analysis” chart sheet, drill down into the data to display the number of volunteer hours for each month.
Instructions
Exam Environment
Exam Interface and Controls
The exam panel provides access to the project task(s). Each project has an associated file in which you will perform the project tasks.
1. Project file
2. Split bar
3. Exam panel
You can modify the exam interface to fit your needs in the following ways:
To increase or decrease the exam panel font size, press Ctrl+Plus or Ctrl+Minus.
To change the height of the exam panel, drag the split bar between the project file and the exam panel.
To minimize the exam panel, click the Collapse Panel arrow in the upper-left corner of the exam panel. The minimized exam panel displays the Expand Panel button, the project number and name, the remaining time, and the Restart Project and Submit Project buttons. To move between tasks, you must expand the exam panel.
To restore the interface to the default appearance, click the Restore button near the upper-right corner of the exam panel.

4. The Information bar at the top of the exam panel displays the current project and total number of projects, the remaining exam time, and the following commands:
Collapse Panel. Minimizes the exam panel to provide more space for the project file.
Restart Project. Closes and reopens the current project file without saving your changes.
Submit Project. Saves your changes, submits the project file, and moves to the next project.
Calculator. A calculator is available in some exams. You are not required to use the calculator.
Restore. Restores the size and position of the project file and exam panel to the defaults.
Help. Displays information about the exam interface.
5. The Content area displays the task tabs and the current task description.
6. The Navigation area at the bottom of the exam panel contains the following commands.
Previous Task/Next Task. Saves your response and moves to the previous or next task in the current project.
Leave feedback after exam. Flags the task to indicate that you want to leave feedback about it after the exam.
Mark for review. Flags the task to indicate that you want to return to it before you finish the exam.
Mark as complete. Flags the task to indicate that you feel you have completed the task.
In projects that contain multiple tasks, you can switch between tasks by clicking the task tab, Next Task button, or Previous Task button.
End of the instructions.
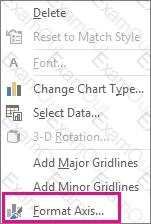
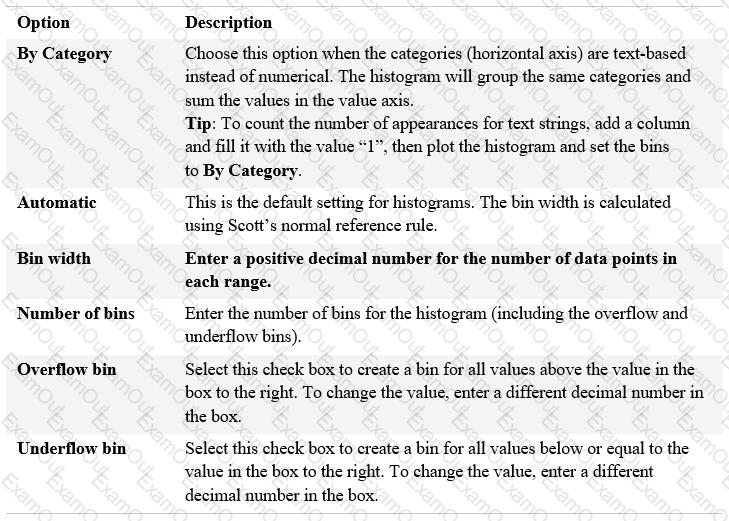
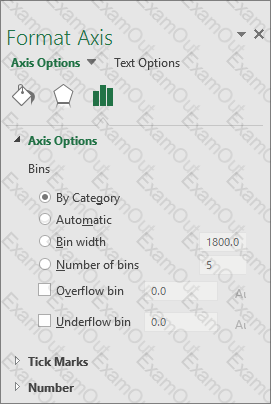
On the “New Products” worksheet, create a Histogram chart that shows the “Retail Price” of the products in bins with widths of $10.
The chart size and position do not matter.